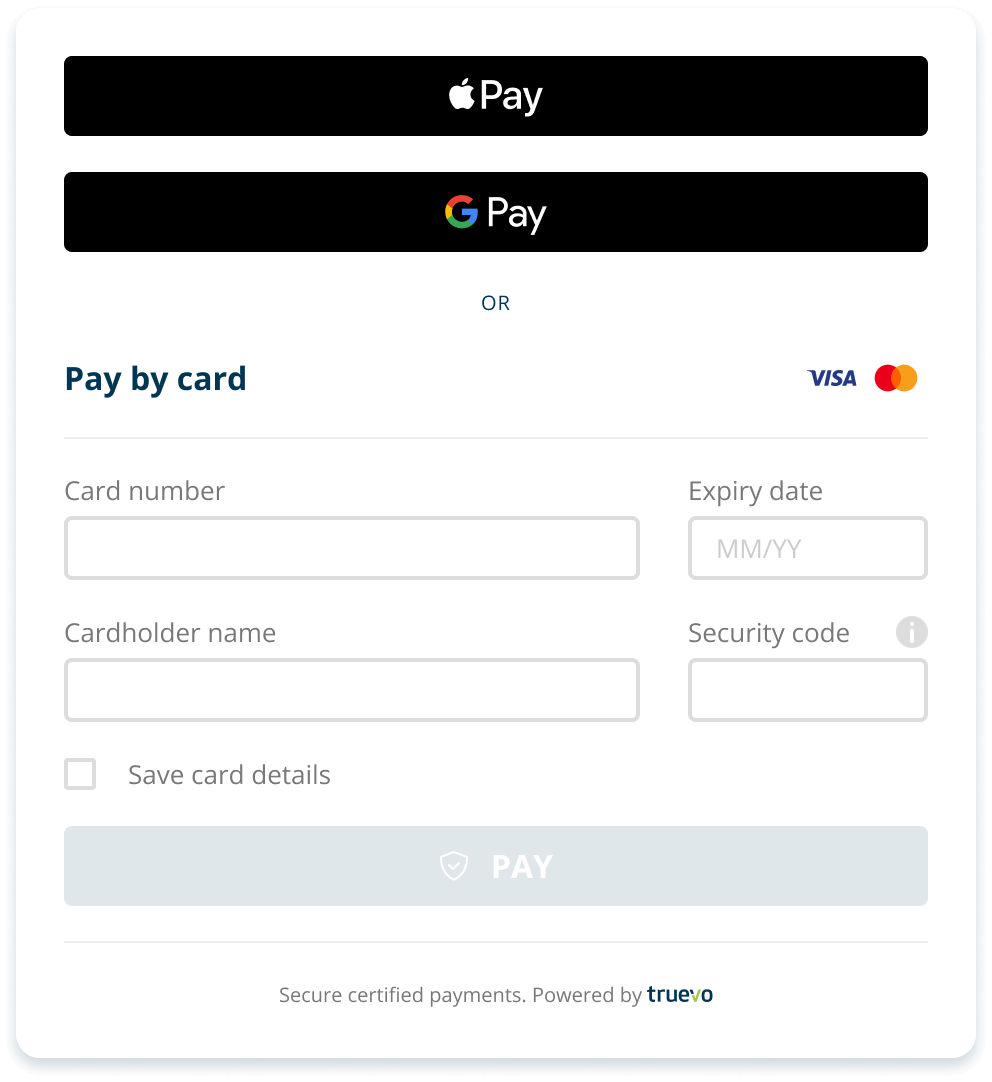
Payment Widget overview
The Payment Widget allows is a pre-built JavaScript UI that allows you to embed payments directly into your custom website without extensive development work.
Benefits of the Payment Widget
-
It allows you to begin accepting payments faster.
-
It’s simple and easy to integrate into your current website.
-
You can customise the widget to the style that best suits your needs.
-
It takes care of the entire transaction process, including the collection of payment information and the security of sensitive data. This reduces your compliance requirements and lets you focus on your business.
How does the Payment Widget work?
-
Truevo offers a pre-built Payment Widget form that you embed on your website. Buyers then provide their payment information directly on your checkout page within the embedded widget.
-
Once the customer submits their payment, Truevo automatically processes the payment on your behalf.
How to integrate a Payment Widget
When your customer loads a checkout page, add the following code to the page:
					<!DOCTYPE html>
<html lang="en">

<head>

    <meta name="viewport" content="width=device-width, initial-scale=1.0">
    <title>Document</title>
    <script data-minify="1" src="https://docs.truevo.com/wp-content/cache/min/1/widget/merchant.minified.js?ver=1770881856" data-rocket-defer defer></script>
    <script data-minify="1" src="https://docs.truevo.com/wp-content/cache/min/1/jsapi/v1/apple-pay-sdk.js?ver=1770881856" data-rocket-defer defer></script>
    <script data-minify="1" type="text/javascript" src="https://docs.truevo.com/wp-content/cache/min/1/npm/crypto-js/crypto-js.js?ver=1770881856" data-rocket-defer defer></script>

</head>

<body>
    <div id="pay">
        <button onclick="openCheckout()">Pay Now</button>
    </div>

    <div id="truevo_form_container" />


<script>(()=>{class RocketElementorPreload{constructor(){this.deviceMode=document.createElement("span"),this.deviceMode.id="elementor-device-mode-wpr",this.deviceMode.setAttribute("class","elementor-screen-only"),document.body.appendChild(this.deviceMode)}t(){let t=getComputedStyle(this.deviceMode,":after").content.replace(/"/g,"");this.animationSettingKeys=this.i(t),document.querySelectorAll(".elementor-invisible[data-settings]").forEach((t=>{const e=t.getBoundingClientRect();if(e.bottom>=0&&e.top<=window.innerHeight)try{this.o(t)}catch(t){}}))}o(t){const e=JSON.parse(t.dataset.settings),i=e.m||e.animation_delay||0,n=e[this.animationSettingKeys.find((t=>e[t]))];if("none"===n)return void t.classList.remove("elementor-invisible");t.classList.remove(n),this.currentAnimation&&t.classList.remove(this.currentAnimation),this.currentAnimation=n;let o=setTimeout((()=>{t.classList.remove("elementor-invisible"),t.classList.add("animated",n),this.l(t,e)}),i);window.addEventListener("rocket-startLoading",(function(){clearTimeout(o)}))}i(t="mobile"){const e=[""];switch(t){case"mobile":e.unshift("_mobile");case"tablet":e.unshift("_tablet");case"desktop":e.unshift("_desktop")}const i=[];return["animation","_animation"].forEach((t=>{e.forEach((e=>{i.push(t+e)}))})),i}l(t,e){this.i().forEach((t=>delete e[t])),t.dataset.settings=JSON.stringify(e)}static run(){const t=new RocketElementorPreload;requestAnimationFrame(t.t.bind(t))}}document.addEventListener("DOMContentLoaded",RocketElementorPreload.run)})();</script></body>
<script type="text/javascript">
    const configuration = {
        transactionType: 'sale',
        widgetConfiguration: {
            language: 'EN',
            showTruevo: true,
            iframeStyles: {
                theme: 'Classic',
                style: 'body {background:none}'
            }
        },
        transaction: {
            paymentReference: 'Truevo Test',
            merchantReference: 'Truevo Test',
            amount: {
                totalAmount: 0.10,
                currencyAlphaCode: 'GBP',
                details: {
                    paymentAmount: 0.10,
                    gratuityAmount: 0
                }
            },
        },
        merchant: {
            descriptor: 'Testing by truevo',
            mid: '',
            tid: '',
            redirectUrl: 'https://www.success.com'
        },

        customer: {
            firstName: 'Truevo',
            lastName: 'TEST',
            birthDate: '1952-10-23',
            contact: {
                email: 'jack.ellish@example.co',
                mobile: '123123456789',
                phone: '123123456789',
                workPhone: '123-123456789',
                url: 'www.jackellish.co.ie',
                ip: '127.0.0.1'
            },
            billingAddress: {
                street1: 'PO Box 11223',
                street2: 'Brenvilla',
                city: 'Akron',
                state: 'Munster',
                postCodeZip: '54321',
                countryAlphaCode: 'IE'
            }
        },

        additionalData: []
    };

    function openCheckout() {

        TruevoCheckout.initialize(configuration);
        const truevoCheckout = TruevoCheckout.mount('#truevo_form_container');


        truevoCheckout.addEventListener('loadCompleted', res => {
            console.log(res.detail);
        });

        truevoCheckout.addEventListener('loadFailed', res => {
            console.log(res.detail.error);
        });

        truevoCheckout.addEventListener('transactionCompleted', res => {
            console.log(res.detail);

        });

        truevoCheckout.addEventListener('transactionDeclined', res => {
            console.log(res.detail);

        });

        truevoCheckout.addEventListener('transactionFailed', res => {
            console.log(res.detail);

        });

    }
</script>
</html>
Let’s explain what’s taking place in the above sample code.
Start by including a div element in the place where you want the payment form to be displayed.
Include a script tag that loads the Truevo Hosted Payments Widget SDK (merchant.minified.js).
Configure the payment widget within another script tag directly on the page.
Do the following within that script:
- Create a configuration object using the various attributes of the payment you wish to capture, such as type of the transaction, widget configuration settings (including your preferred widget style configuration), transaction details, merchant details, customer details, and generated digital signature.
Note that the signature property is a digital signature that allows us to validate the authenticity and integrity of the request sent to us. Read how to create a digital signature here.
-
-
Initialize the widget using the TruevoCheckout.initialize function while passing the configuration object into it as a parameter.
-
Create a Truevo checkout session by calling TruevoCheckout.mount while passing a selector that identifies the div element that renders the payment widget form.
-
Add various event listener functions that are called whenever the specified payment event takes place.
-

Sample response
					{
  rrn: '<The payment host's unique reference for the payment>',
  transactionId: '<Truevo's unique reference for the payment>',
  transactionStatus: '<The status of the payment>',
  responseCode: '<The response code of the payment>',
  merchantReference: '<The value that was passed in configuration.transaction.merchantReference>'
}
Custom styles
The Payment Widget offers the ability to apply custom styles. For more information and example implementation please review our Payment Widget styling capabilities.