WooCommerce Payment Plugin
Plugin overview
The Truevo WooCommerce Payment Plugin makes accepting ecommerce payments easy. Your customers will not only be able to make payments on your website but will also have the ability to securely save their card details for convenient repeat purchases. In addition, you will be able to perform full reversals and full or partial refunds from the WordPress backend system.
We’ve also included some important transactional information for you, meaning doing reconciliation between your WordPress backend and Truevo Portal just got easier.
Installation steps
Step 1
Download the plugin. Do not unzip or rename the file. Doing this will cause the installation to fail.
Step 2
Let’s be careful. Sometimes complications can arise when you install third-party modules. We suggest that you make a backup of your shop. We recommend first testing the integration on a test system, if possible.
Step 3
Log in to your WordPress Admin, navigate to Plugins > Add New and click on Upload Plugin.
Step 4
Click Choose File and select the downloaded Truevo Plugin zip, then select Install Now. Remember, it’s important that you do not unzip this file before you upload it. If you are struggling to find the plugin on your computer, it is labelled: truevo-gateway-widget-woocommerce.
Step 5
Once the file has been uploaded, it may give you the option to activate the plugin immediately. If not, navigate to Plugins > Installed Plugins > and Activate Truevo Payments. Check that the version installed is v1.9.15.
Configuration
Step 1
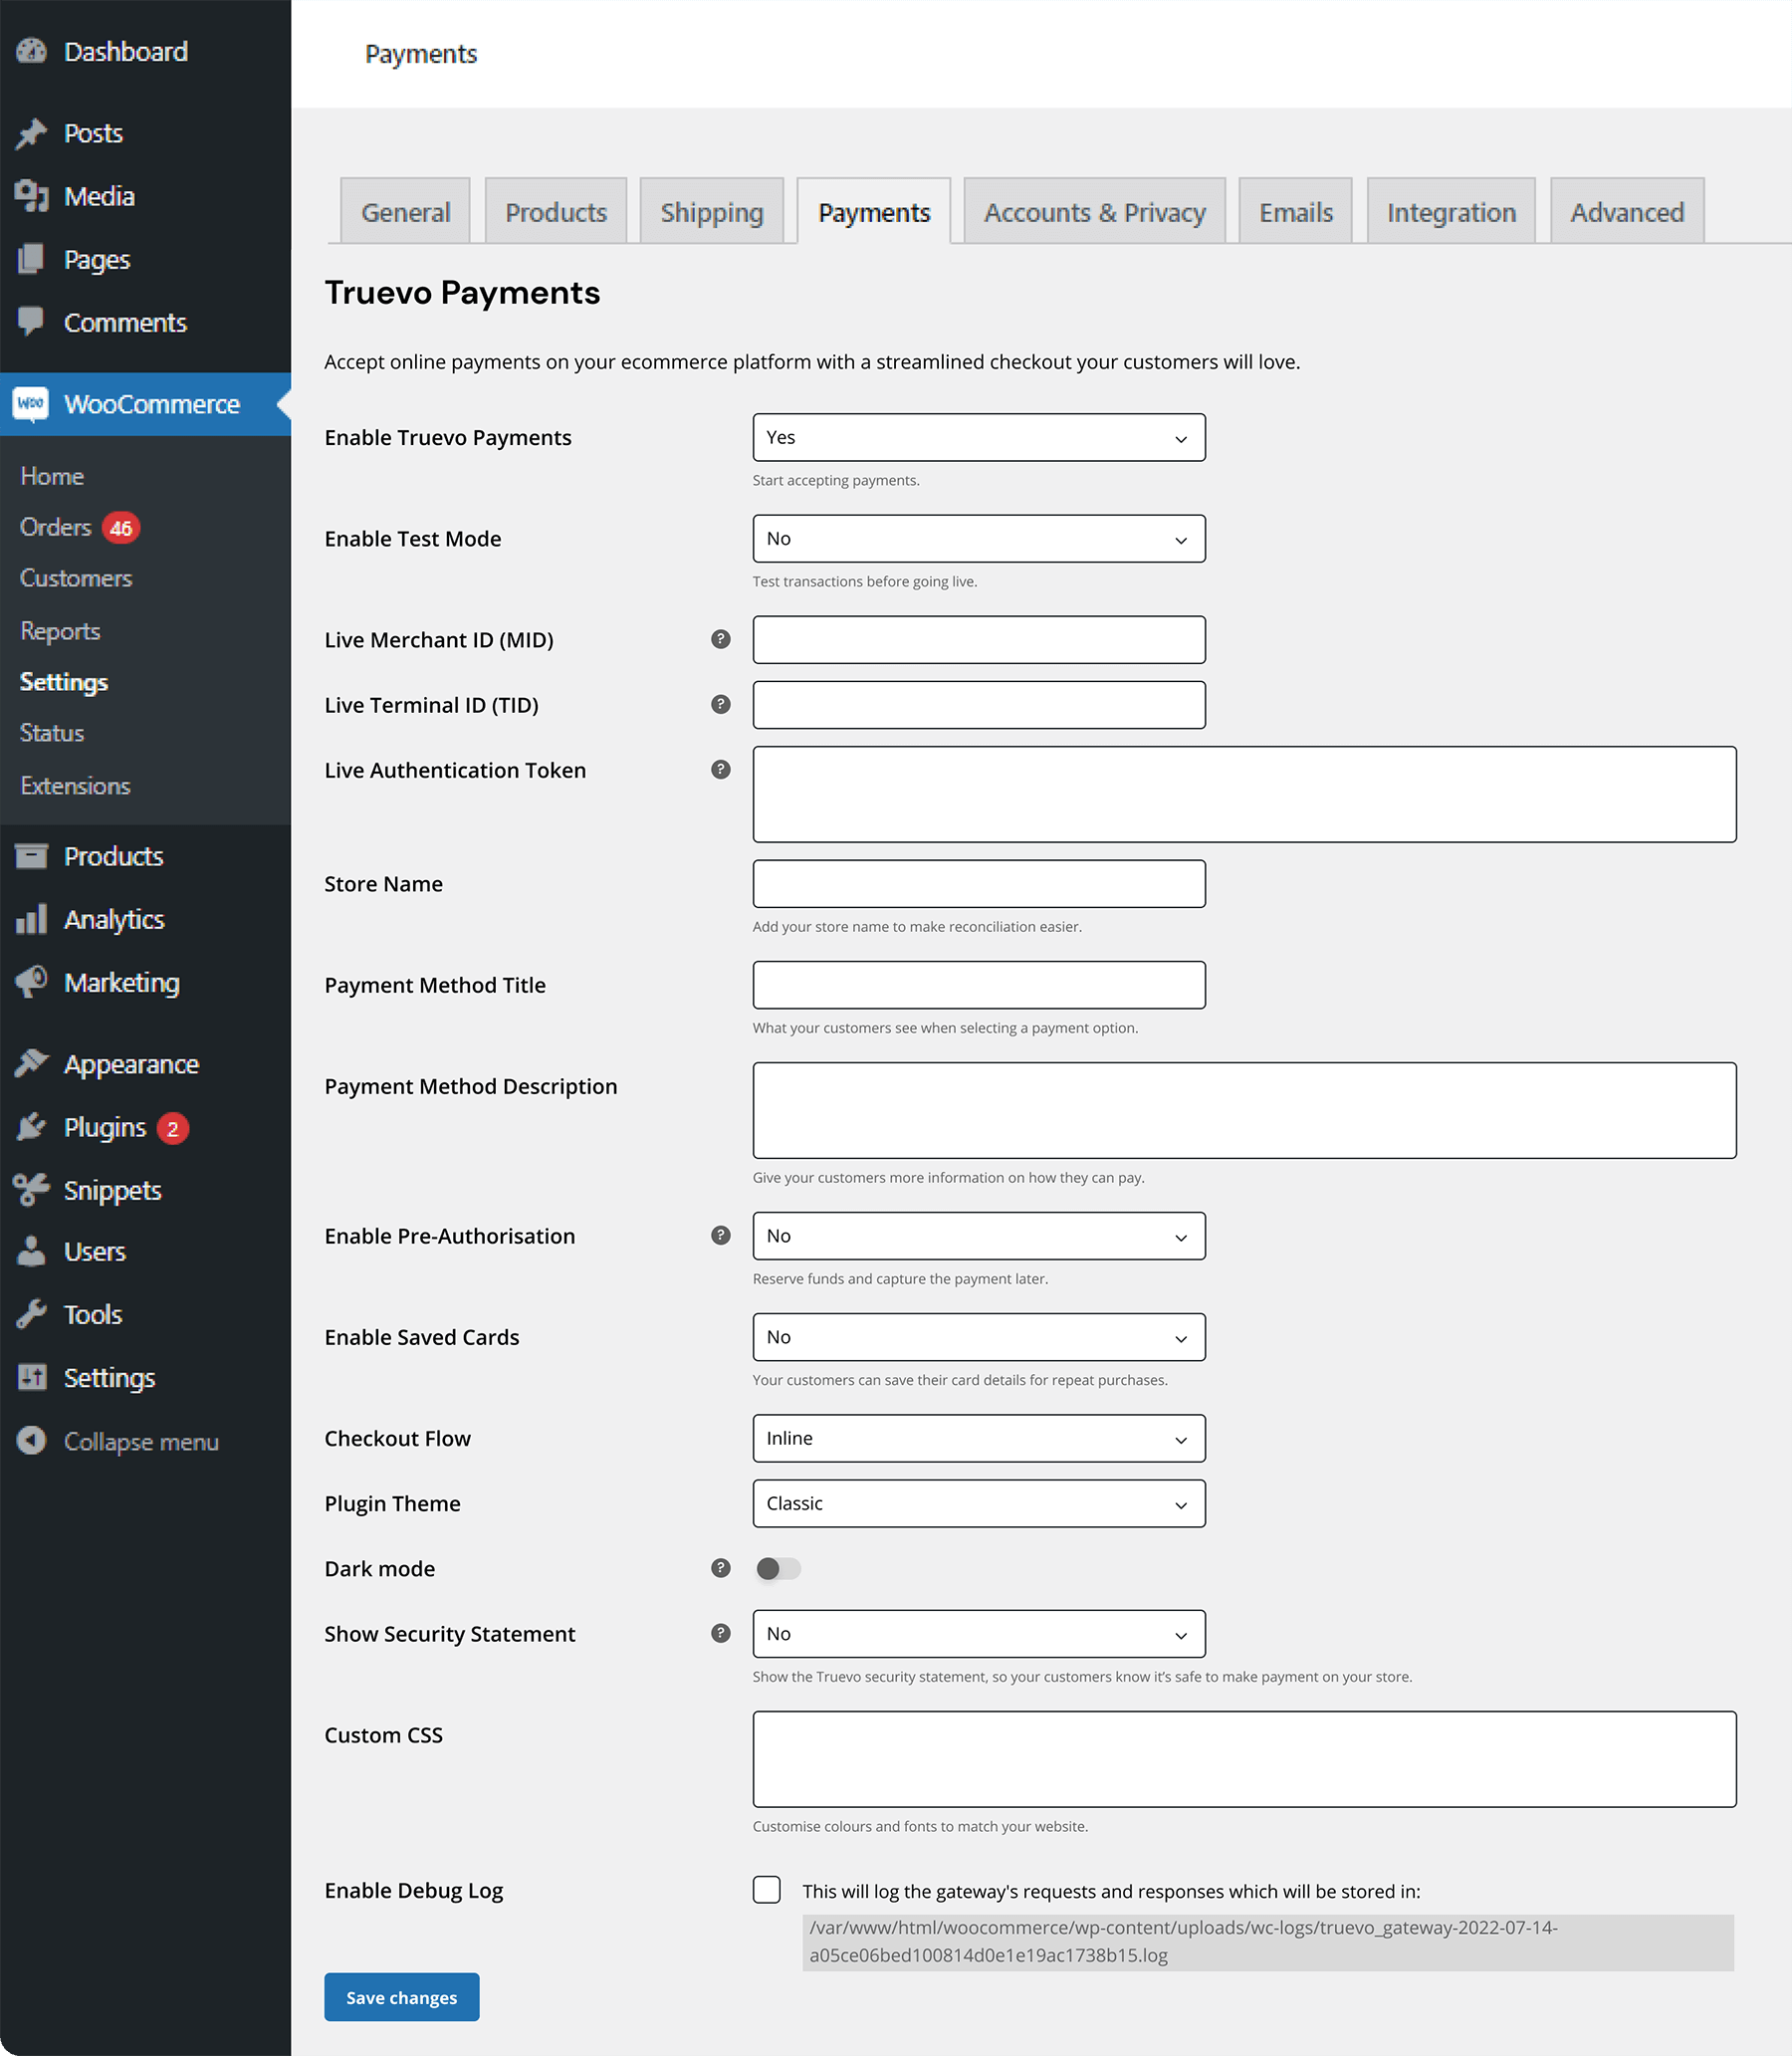
Now that you have activated the Truevo Payments Plugin, you can open the plugin settings. To access settings, go to Plugins > Installed Plugins > locate Truevo Payments > and click on the Settings link under the plugin heading. Once you’ve opened settings, the first thing you need to do is select Enable Truevo Payments.
Step 2
Add your Live Merchant ID (MID), Live Terminal ID (TID) and Live Authentication Token. These pieces of information would have been provided to you via email. What does each of these do?
The Merchant ID is a unique number that we’ve registered with the schemes and is what is used to identify your business. Each MID is also associated with a single currency.
The Terminal ID is linked to the MID and is used to identify the source of the transaction.
The Authentication Token is assigned to an account and makes it possible to perform transaction requests such as reversals and refunds. It also allows us to provide detailed transaction information to the WordPress backend, making reconciliation easier.
At this point, you can also Enable Test Mode. If you choose to enable test mode, your live MID and TID will save, and you will not have to input them again. However, you will need to replace the Token. We recommend doing a few tests before going live. You can find testing credentials below.Step 3
Next, you will be asked to provide a Store Name, Payment Method Title and Payment Method Description.
The Store Name is the business name you would like your customers to see when completing payment on your website. You can use your business name or trading name here.
The Title is what your customers will see when selecting a payment method. When choosing what to place here, we suggest keeping it short, simple and clear, for example, use: Pay with a card.
The Description provides your customers with more information about how they are paying. Here it’s a good idea to mention what types of cards they can use, for example: Pay with a Visa, Mastercard or Maestro debit or credit card.
Step 4
You will now see the option to Enable Pre-Authorisation. By enabling this, each payment made on your store will be a pre-authorised payment. In order to complete the transaction, you will need to capture the payment. You can use the WordPress backend to capture the full pre-authorised amount. However, if you would like to capture a partial pre-authorisation, you will need to do this from the Truevo Portal. Please note that this feature will only work if your account has been set up to accept pre-authorisations.
Step 5
Next, you will be asked if you want to Enable Saved Cards. This feature allows your customers to securely save their card details, making repeat purchases easier and faster.
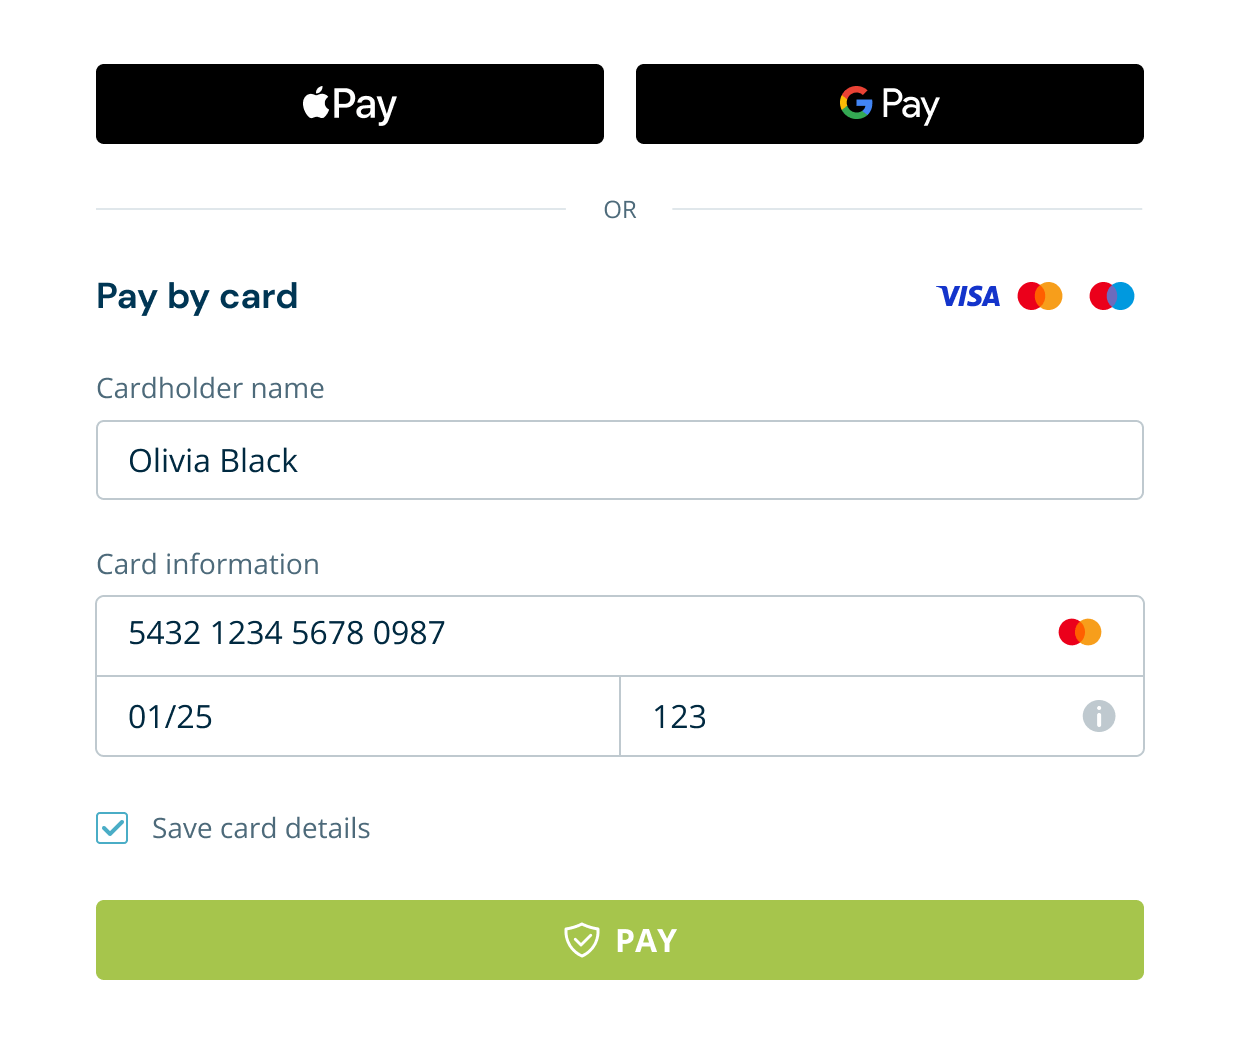
How does it work? If enabled, your customer will need to create a profile on your ecommerce store. When entering their card details for the first time, they will need to select the checkbox that says: Save card. When your customer returns to make another purchase, they will be shown a list of card details they have previously provided and can select an existing card or add a new one. If they select an existing card, they will simply enter their security code and go through the 3D Secure v2 flow. This significantly speeds up the checkout process.
Step 6
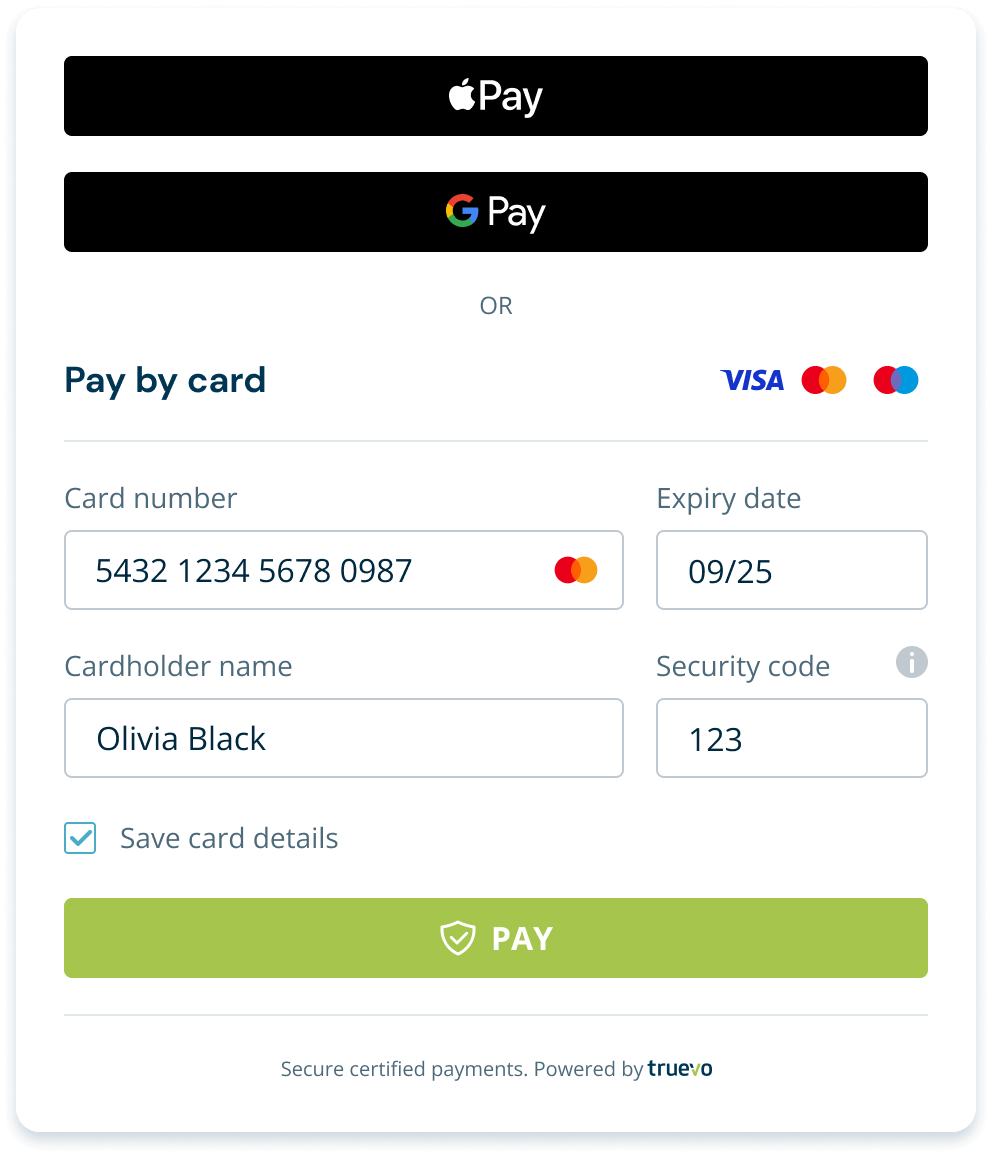
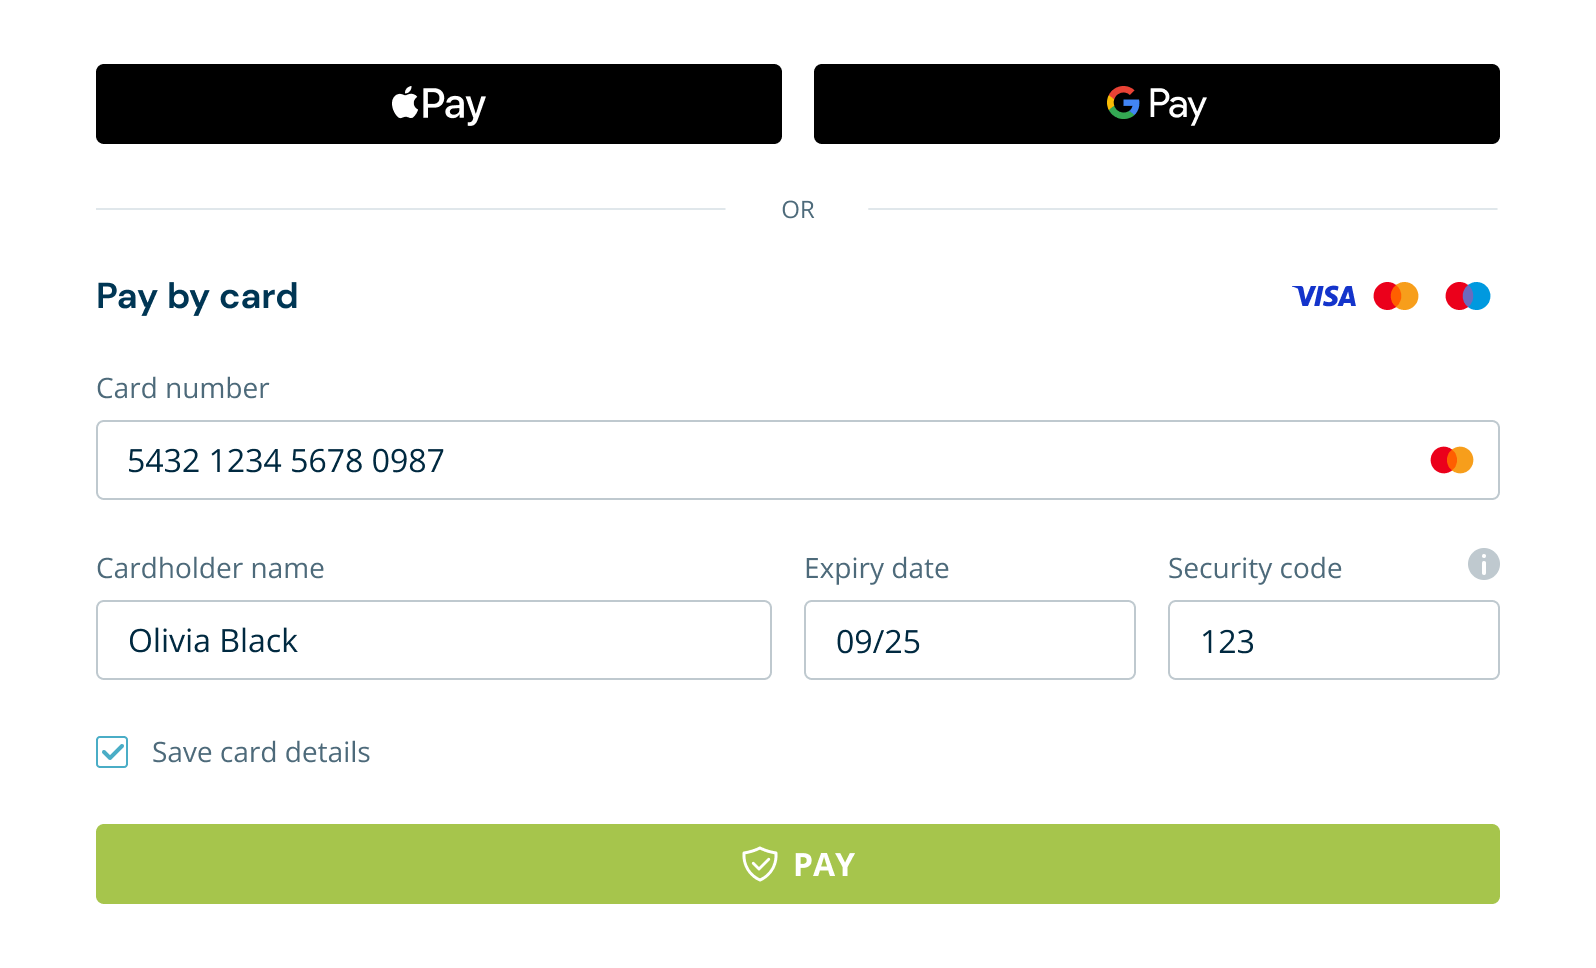
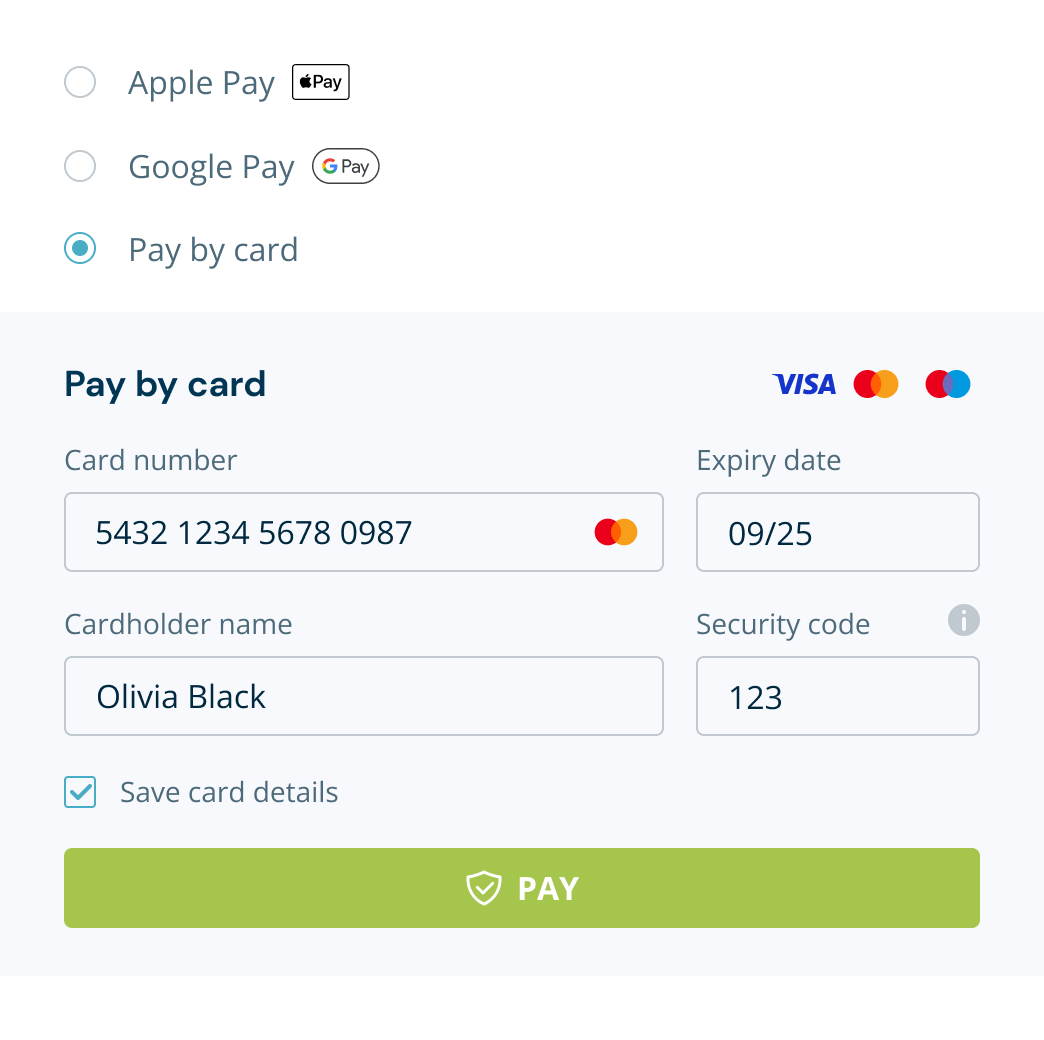
The default Plugin Theme is set to "Classic", but you can change the payment form design by selecting your preferred theme. There are five themes to choose from.
The Dark mode toggle makes it possible to change your payment form to dark mode. This setting will not change your whole website to dark mode.
The Plugin Themes can be viewed below:

Step 7
You'll see that Checkout Flow is automatically set to Inline. This means that your payment form will appear on your checkout page. If you would like your payment form to be on a separate page within your website, change this to Redirect.
Step 8
You can choose whether you'd like to display the Truevo Security Statement. When enabled, your customers will see the text "Secure certified payments. Powered by Truevo." at the bottom of the payment form so they know it's safe to make payments on your website.
Step 9
When designing the Truevo plugin themes, we went for a very minimalistic design to make it look like it belongs on your website. If you would like to personalise your form, you are welcome to do so by adding some Custom CSS. Please note that this will only let you make adjustments to the colour, font and general styling. You will not be able to change the placement of the form or the payment flow. For more information on how to customise your form with CSS, please review our styling capabilities documentation.
Step 10
The last configuration item is Enable Debug Log. We encourage you to enable this as it will provide valuable information in the event that you are experiencing any issues with a payment.
Step 11
And last but not least, save your changes. If you close this configuration page without saving, all of your settings will be deleted, and you will need to redo the configuration.
Test integration credentials
Please note that test credentials will not work in a live environment and that any transactions done in the test environment will not appear in your Truevo Portal. The credentials you use must also be in the same currency as your online store. Below, we have provided test credentials for EUR, GBP and USD. However, the token will be the same for all three currencies.
Test card details
Please note that test card details will only work with the test integration credentials and not with your live credentials. The test card details below will not include the 3DS flow. To test 3DS, please use your live credentials and a real card.
How to manage transactions from WooCommerce
How to capture a payment
Need to secure payment for a future purchase but don’t want to take a deposit? Pre-authorisation is the solution for you. Using pre-authorised payments lets you hold the desired amount and only capture the payment once the product or service has been delivered. This feature is particularly useful if you are in the hospitality industry, have an appointment-based business or make products to order.
Please take note
This feature will only work if you set up pre-authorisations during your application and onboarding process. If you did not set this up and would like to, please contact our support team.
Step 1
Log into your WordPress Admin. From the left menu bar, navigate to WooCommerce > Orders. Locate the transaction you wish to refund and click on it. The order status should be On Hold.
Step 2
You will now be able to see all the order details and have the ability to edit the order. WooCommerce separates your order information into containers. On the far right, there is a container at the top of the page called Order Actions. Open the dropdown list. Navigate to the last item in the dropdown called Capture the Payment, select it and then click on Update.
Step 3
The screen will refresh, and a new Order Note will appear, saying that the payment has been successfully captured. Your order status should now have been updated to Processing.
How to perform reversals and refunds
With our new Truevo Payment Plugins, you are able to perform reversals and refunds from within the WordPress backend. To start, we will define the difference between a reversal and a refund.
A reversal occurs when the funds from a transaction are returned to a customer before the payment has cleared. This means that the reversal request was performed on the same day that the transaction took place (before 00:00 CET/CEST). For this reason, reversals are also for the full transaction amount, and it will be as if the transaction never occurred, i.e. there will be no record of the transaction in your customer’s bank account.
A refund occurs when the funds from a transaction are returned to a customer after the payment has cleared. Because the transaction has been completed and the refund is a new transaction, the transaction amount can be fully or partially refunded and will show up as a separate transaction in your customer’s bank account.
Reversal
Step 1
Log into your WordPress Admin. From the left menu bar, navigate to WooCommerce > Orders. Locate the transaction you wish to reverse and click on it. Please note that the transaction must have happened on the same day (before 00:00 CET/CEST) for it to be classified as a reversal.
Step 2
You will now be able to see all the order details and have the ability to edit the order. WooCommerce separates your order information into containers. The second container will list all of the items your customer has ordered. In the bottom left corner of this container, you will see a button that says Reverse. Click on it.
Step 3
A popup window will appear asking if you are sure you want to proceed with the reversal. Select Ok. The page will then refresh, and your order items will now state Refunded with the amount in red.
Step 4
Double-check the Order notes on the right-hand side panel. This will confirm whether the reversal was successful or not. Your order status should also now say Cancelled.
Refund
Step 1
Log into your WordPress Admin. From the left menu bar, navigate to WooCommerce > Orders. Locate the transaction you wish to refund and click on it. Please note that the transaction must be at least one day old before it can be classified as a refund.
Step 2
You will now be able to see all the order details and have the ability to edit the order. WooCommerce separates your order information into containers. The second container will list all of the items your customer has ordered. In the bottom left corner of this container, you will see a button that says Refund. Click on it.
Step 3
The section will expand, and you will be asked how much you want to refund and given the option to add a reason for the refund. We will let you know what the maximum refund amount is. Please note that you can do a partial or full refund.
Step 4
A popup window will appear asking if you are sure you want to proceed with the refund. Select Ok. Once selected, you will then be redirected back to the Edit order page, and your order items will now state Refunded with the amount in red.
Step 5
Double-check the Order notes on the right-hand side panel. This will confirm whether the refund was successful or not. Your order status should also now say Cancelled.